Been really busy and haven't updated this blog in a while.
I've been on vacation, with my in-laws here, and spent about 5 days 8 hours each working on the tailcone.
It really is a lot easier with an extra set of skilled hands and this thing is really starting to look like an airplane now.
First job was to construct the tailcone rear bulkhead, this is a complex piece, it has a lot of rivets of different kinds. It's also a very important piece, where everything we've built so far attaches together, which is why it has to be so strong.
As usual there are some new techniques to learn here, the tie-down skid for instance is fabricated from raw stock using a template and a selection of tools. I really enjoyed making that bit.
This is also the first time I've had to tap a thread into a drilled hole, and it was a lot more difficult than I expected. (I learned later that the tap I was sent in the toolkit is a very poor example, a decent tap set worked a lot easier on the next section. Overall I'm not at all impressed with the quality of the tools I got in the planetools kit, most of them have been replaced with better quality versions already.)
The finished rear bulkhead
It took about 2 days to prepare all the parts for the bulkhead, deburring priming, countersinks, fabricating the tie down etc., and the assembly took just a couple of hours, it was really quite easy to squeeze all the rivets with 2 people.
Next task was to prepare the remaining tailcone frames. These frames are much simpler, they are really just ribs that come in two halves that need to be joined.
Next I had to cleco all the skins to the frames so that I could mask them for priming the contacting surfaces.
Once I had all the skins taped at the overlapping joints, we disassembled it all, primed the mating surfaces and made sure we had enough break on the joints for a smooth fit.
then the final assembly was quick and easy. This piece really goes together quickly and makes the whole project look like it's much further along :)
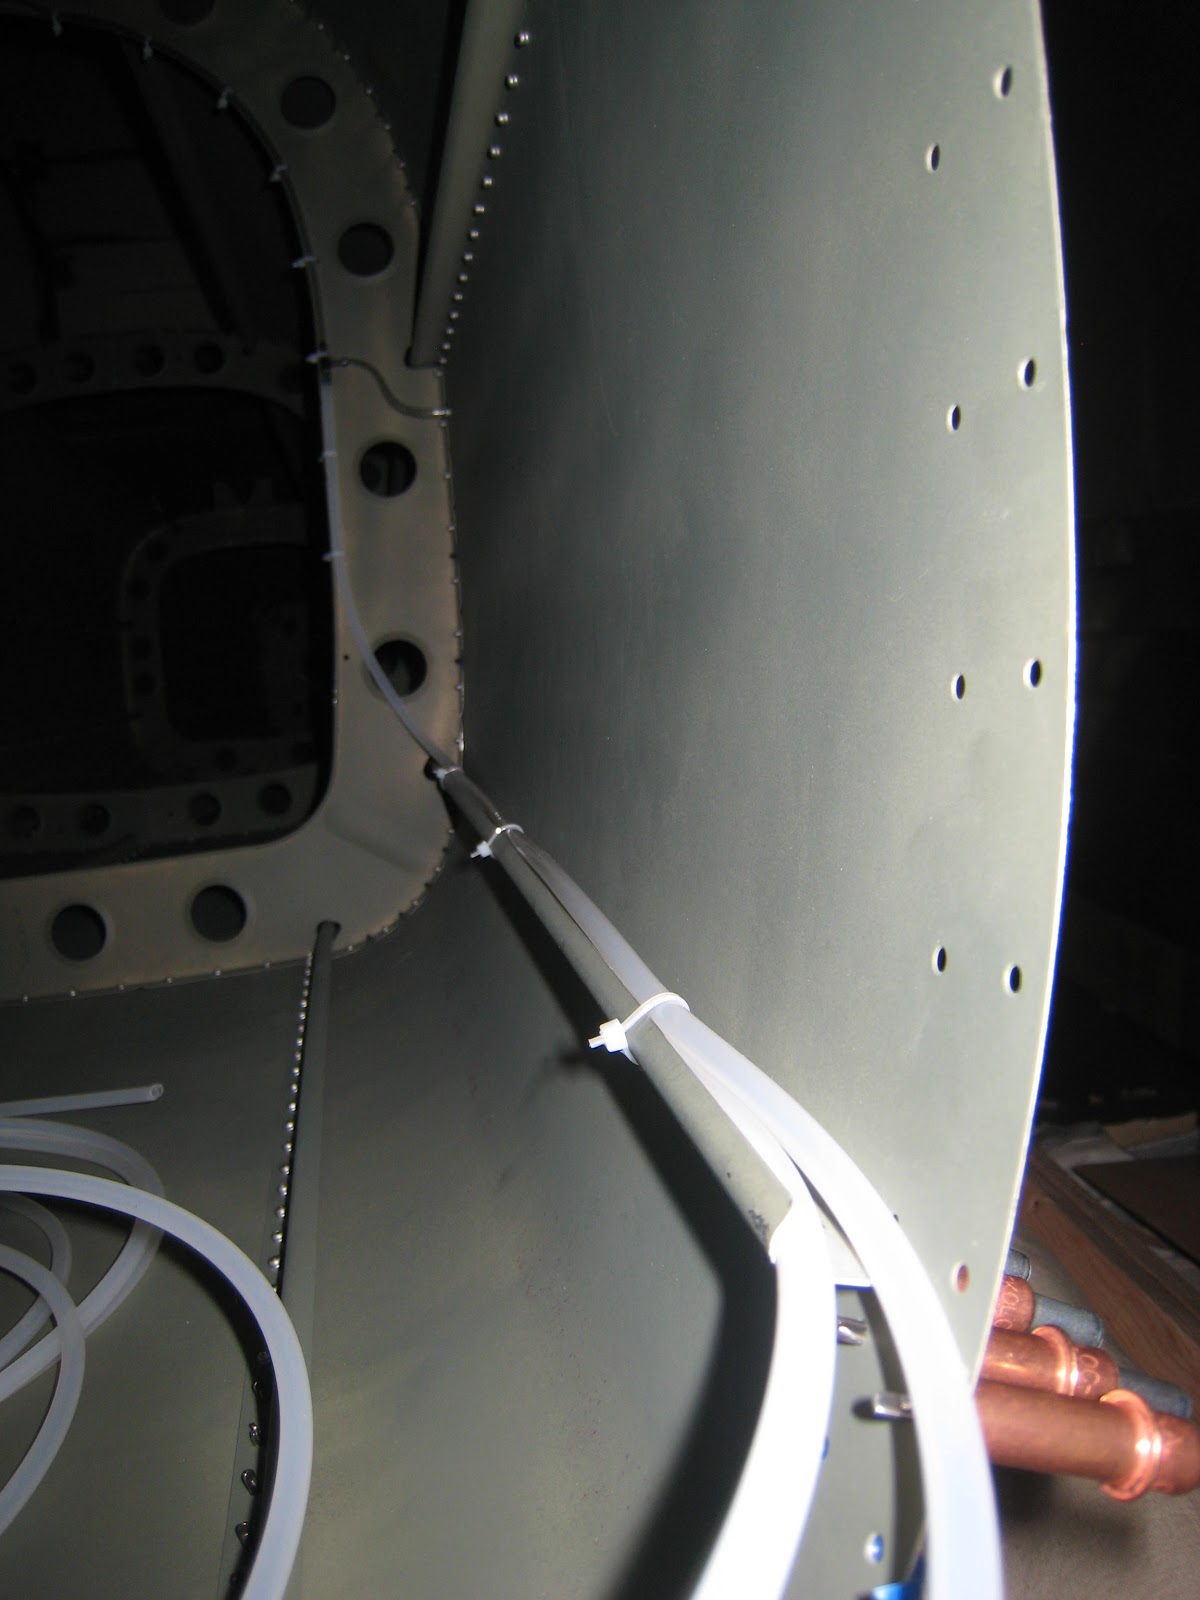
Notice that the static pressure vents have been installed as well as the electric trim wires that run the full length of the tailcone.
The plans say to just run the wire in the metal J channel, but that leaves the wire making a very sharp bend on a metal edge and I don't like that idea, so I ran a length of plastic tubing as conduit to protect the wires.
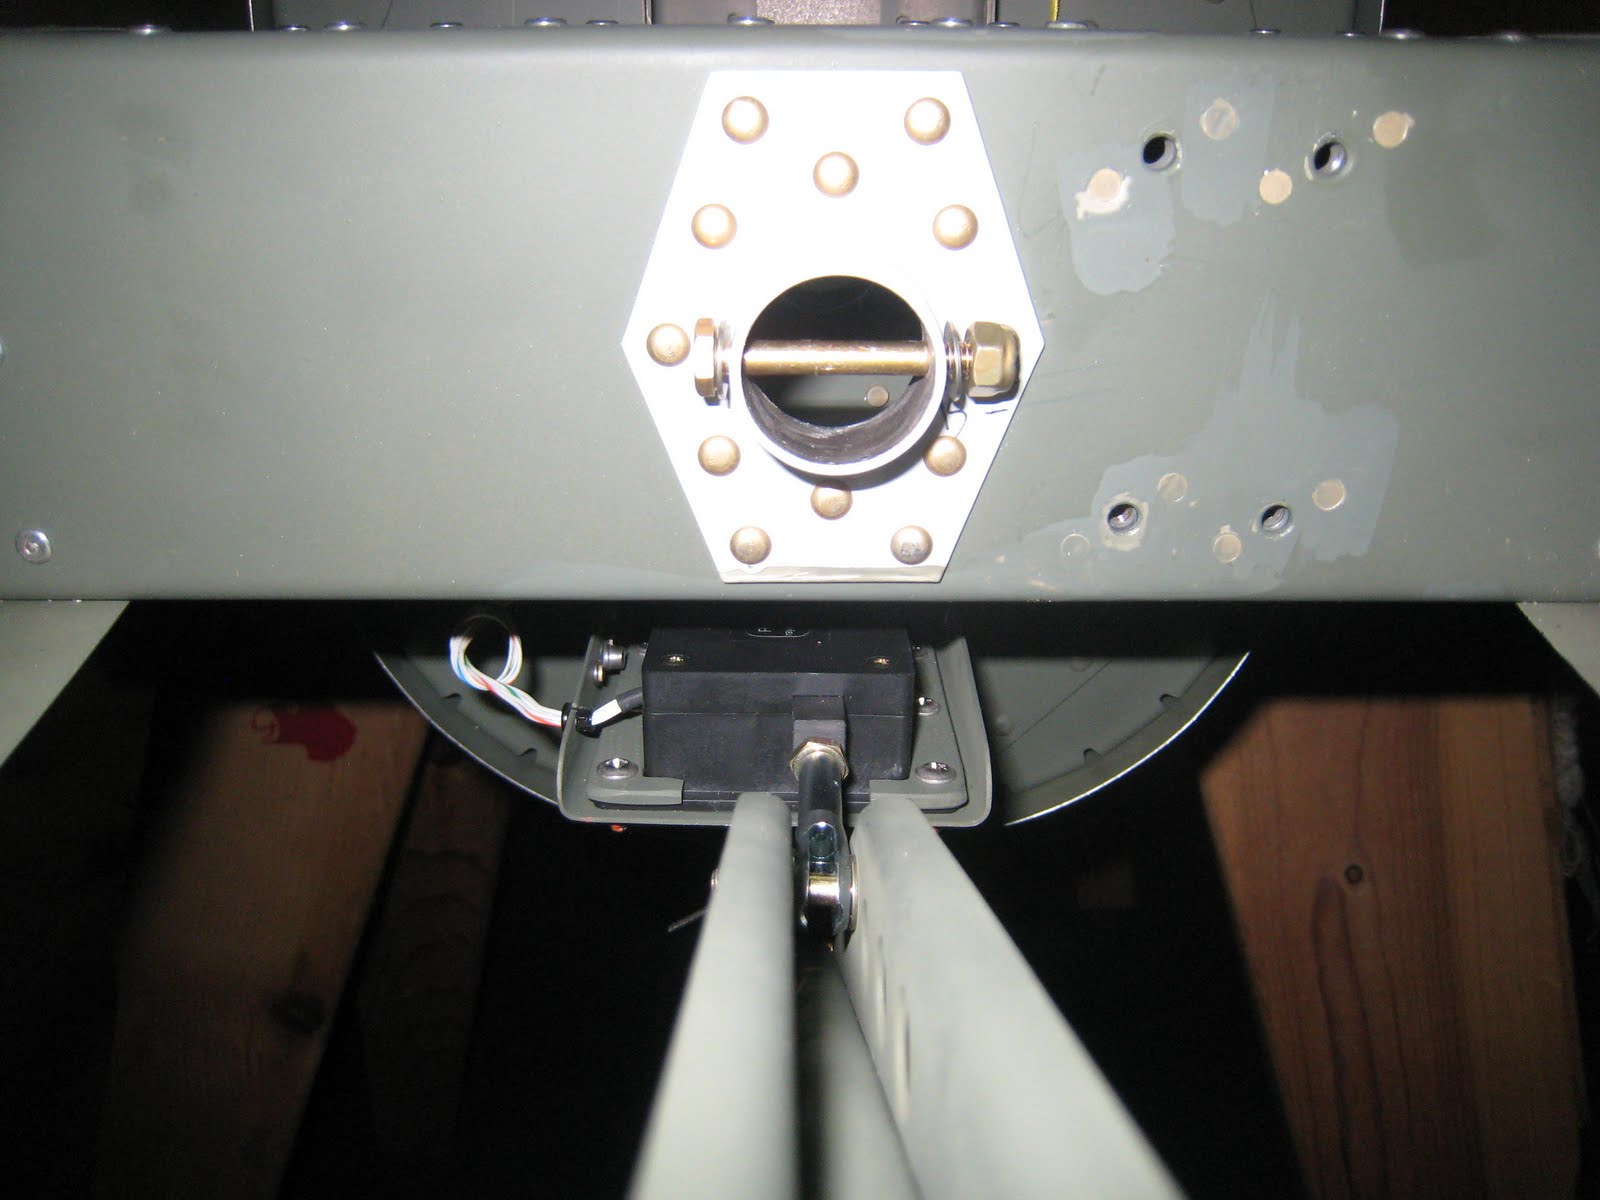
Before the tailcone was assembled I did a test fit of the stabiliator to determine the correct washers to place around the bearings. The washers are then superglued in place as per the plans, since you can't get your hands in there later.
One last bit of priming
Now the really fun bit!
I got to attach all the pieces I've made so far, now this really does look like it might be an airplane !
Finally the AST tabs are attached with the actuator arm and the electric trim motor.
Now I can see how this all works, it's a really nice design.
I am building a Vans RV-12 light sport airplane in my garage. This blog shows details of the build as it progresses
Tuesday, July 12, 2011
Saturday, June 18, 2011
Horizontal Stabilator Finished - 8 hours, 77 total so far
My in-laws have come over to visit for the summer and I'll be taking a bit more time off work for socializing, and hopefully some aircraft construction :)
My father-in-law repaired aircraft for the RAF and is a metalworker by trade, so I am really hoping to learn a lot and get my skills up to snuff with his help.
He worked on huge monster aircraft Blackburn_Beverley so my little -12 should be a doddle.
Still, regardless of the size difference, it's amazing how similar the construction techniques are even after 50 years.
So, another hard days work saw the end of the horizontal stabilator section and I am now ready to start the tailcone which will pretty much finish this first rv-12 kit off, which is perfect timing since Vans says the wing kit is due for delivery next week.
Barry pulling the last rivets:
The hedgehog impression:
Right side done:
My father-in-law repaired aircraft for the RAF and is a metalworker by trade, so I am really hoping to learn a lot and get my skills up to snuff with his help.
He worked on huge monster aircraft Blackburn_Beverley so my little -12 should be a doddle.
Still, regardless of the size difference, it's amazing how similar the construction techniques are even after 50 years.
So, another hard days work saw the end of the horizontal stabilator section and I am now ready to start the tailcone which will pretty much finish this first rv-12 kit off, which is perfect timing since Vans says the wing kit is due for delivery next week.
Barry pulling the last rivets:
The hedgehog impression:
Right side done:
All done
Hinges attached, torqued and sealed
Sunday, June 12, 2011
Horizontal Stabilator Assembly - 12 hours, 69 total so far
This weekend was much more fun, after a bit of final priming I assembled the horizontal stabilator frame.
Most of the assembly is very straightforward, although you do have to pay careful attention to which rivet to use where, there's some flush pop rivets as well as the regular AN426 countersunk rivets, and also some AN470-AD-4 solid rivets.
I found that the CS4-4 countersunk pop rivet shanks get stuck in the pneumatic rivet puller when being ejected, and so I pulled all those with the hand tool.
The AN426-AD-3 rivets were all set with the hand squeezer, but the AN470-AD-4 rivets are MUCH harder to squeeze, and it's another one of those jobs that requires more arms than I happen to have attached, so I really wanted to use the pnuematic squeezer on those, and there lies this tale:
Here's a little bit of the story that happened during the week.
I had been having trouble with my pneumatic squeezer, it has never worked properly since I bought it for the project in April. Having never owned or operated one before, I wasn't sure if it was faulty, or if it was just my limited experience and poor technique.
I tried to use it for a few rivets on the hinges of the VS, the first part of the kit, but everything was so new to me, I had no idea what was working properly and what wasn't and that part of the kit only used the smaller AN*-AD-3 rivets so up until now I have been using my hand squeezer, which has been working very well, so well in fact that I was now convinced that the pneumatic squeezer was defintely not operating properly.
So I downloaded the latest manual, read it all and took note of the "bleeding procedures"; This particular squeezer is hydraulic just like a car brake system, and even though it is new and shouldn't need maintenance I thought I would give that a try.
Well, as you can imagine, it's a messy job that is designed for people with at least 4 arms which I was unfortunate enough not to be born with, but I did manage to get it done. Once I got it set all up again I tried a rivet, and it was exactly the same as before, just not enough power or travel to properly squeeze a rivet.
Oh, well I decided to return it, and hoped that I could get my money back, I emailed cleveland and they were very helpful and offered to take the unit back for a full refund, nice.
But it was bothering me that I couldn't figure this out, it was a well made expensive unit, why would it function so poorly?, I decided to call the manufacturer, actually I sent email, and they replied almost immediately and were very helpful, offered suggestions on more bleeding and a few other tips, but also said they would have no problem replacing the unit, send it to them directly and they would examine it and figure out what was wrong, I got a very good vibe from them, so decided to give it another go.
So, first thing Saturday morning, I got out the paper towels ready for the mess, and determined to really do this job properly, followed the instructions to the letter, exactly 1 1/2 turns of the valves, as much height as possible for the head over the base unit and this time I pumped the oil through over and over, 8 syringes full.
I didn't see any air escape and so I expected the same poor performance, but wow what a difference, it worked superbly, this is now my favorite tool of the whole job, it squeezed the AN470-AD-4 rivets perfectly with no noticeable effort at all.
I'm glad I stuck with it and sent a note of thanks to the manufacturer for their help.
So, that put me in a good mood and I assembled everything except the skins of the HS which still need priming, and are too big to fit in my "paint tent". It was extremely windy this weekend, so no chance of painting them outside either, so that will have to wait.
I am very happy with the HS, this really looks like a proper airplane part !
Most of the assembly is very straightforward, although you do have to pay careful attention to which rivet to use where, there's some flush pop rivets as well as the regular AN426 countersunk rivets, and also some AN470-AD-4 solid rivets.
I found that the CS4-4 countersunk pop rivet shanks get stuck in the pneumatic rivet puller when being ejected, and so I pulled all those with the hand tool.
The AN426-AD-3 rivets were all set with the hand squeezer, but the AN470-AD-4 rivets are MUCH harder to squeeze, and it's another one of those jobs that requires more arms than I happen to have attached, so I really wanted to use the pnuematic squeezer on those, and there lies this tale:
Here's a little bit of the story that happened during the week.
I had been having trouble with my pneumatic squeezer, it has never worked properly since I bought it for the project in April. Having never owned or operated one before, I wasn't sure if it was faulty, or if it was just my limited experience and poor technique.
I tried to use it for a few rivets on the hinges of the VS, the first part of the kit, but everything was so new to me, I had no idea what was working properly and what wasn't and that part of the kit only used the smaller AN*-AD-3 rivets so up until now I have been using my hand squeezer, which has been working very well, so well in fact that I was now convinced that the pneumatic squeezer was defintely not operating properly.
So I downloaded the latest manual, read it all and took note of the "bleeding procedures"; This particular squeezer is hydraulic just like a car brake system, and even though it is new and shouldn't need maintenance I thought I would give that a try.
Well, as you can imagine, it's a messy job that is designed for people with at least 4 arms which I was unfortunate enough not to be born with, but I did manage to get it done. Once I got it set all up again I tried a rivet, and it was exactly the same as before, just not enough power or travel to properly squeeze a rivet.
Oh, well I decided to return it, and hoped that I could get my money back, I emailed cleveland and they were very helpful and offered to take the unit back for a full refund, nice.
But it was bothering me that I couldn't figure this out, it was a well made expensive unit, why would it function so poorly?, I decided to call the manufacturer, actually I sent email, and they replied almost immediately and were very helpful, offered suggestions on more bleeding and a few other tips, but also said they would have no problem replacing the unit, send it to them directly and they would examine it and figure out what was wrong, I got a very good vibe from them, so decided to give it another go.
So, first thing Saturday morning, I got out the paper towels ready for the mess, and determined to really do this job properly, followed the instructions to the letter, exactly 1 1/2 turns of the valves, as much height as possible for the head over the base unit and this time I pumped the oil through over and over, 8 syringes full.
I didn't see any air escape and so I expected the same poor performance, but wow what a difference, it worked superbly, this is now my favorite tool of the whole job, it squeezed the AN470-AD-4 rivets perfectly with no noticeable effort at all.
I'm glad I stuck with it and sent a note of thanks to the manufacturer for their help.
So, that put me in a good mood and I assembled everything except the skins of the HS which still need priming, and are too big to fit in my "paint tent". It was extremely windy this weekend, so no chance of painting them outside either, so that will have to wait.
I am very happy with the HS, this really looks like a proper airplane part !
Sunday, June 5, 2011
deburr, deburr, deburr, prime, deburr, etc., deburring. 16 hours, 57 total so far
I have spent most of this weekend and last weekend preparing more parts.
I've deburred and primed and deburred and primed.
I did manage to do a little assembly, the ASTs are now fully assembled and I have started the assembly of the Horizontal Stablilator spar.
The finished ASTs
Note that the RV-12 has a single control surface that combines the functions of a horizontal stabiliator (the little wing at the back of an airplane) and the evelators (the bits that make the airplane point up or down), and so it is called a Horizontal Stabilator.
This is the largest part of the aircraft that I have assembled so far.
it is 8 feet wide and is made up of a main spar, front and rear ribs, and covered with 2 large skins.
The first job is to construct the spar, which itself is made from a front and rear spar cover, top and bottom spar sides and 4 ribs.
There's some small pieces to separate and drill and quite a bit of test fitting, final drilling and such to get all the various bits in the right place.
The Vans kit and plans are very well thought out, at first read you often wonder, why the heck is that rivet needed there, or what purpose does this bit have, but as you get further along in the assembly it all becomes clear, everything has a purpose, and every design decision has a reason, it's very enlightening.
Another thing that amazes me is how simple the basic design idea is, really light and really strong. It is called Monocoque construction, and uses the skins to create a load bearing surface, allowing for a very light interior frame that does not need to take that much stress.
Wooden houses are built the same way, simple 2x4s make a frame, and wouldn't be strong enough to hold up a house, until the exterior plywood (or usually OSB these days) sheets are added, It's actually those sheets that distribute the load, and make the construction super strong because of the large surface area, and so it is for airplanes, except we use Aluminium because it's lighter and doesn't rust or rot.
(The americans use Aluminum which I hear is almost as good :) )
There are other kinds of construction that use welded steel tube frames to take the load, and cover the frames with thin light material just to provide the lift surface area and reduce drag, this is called Truss construction and is used in airplanes like the piper cub. It's not as common these days, probably because the aluminium monocoque is lighter, and less weight means more performance per horse power, more efficient, cheaper to run, but those old piper cubs from 1940 are still flying and are probably 5 times stronger than they ever needed to be !
Here's where I got to before clocked out for the day on Sunday, the horizontal stabilator spar partly assembled:
I've deburred and primed and deburred and primed.
I did manage to do a little assembly, the ASTs are now fully assembled and I have started the assembly of the Horizontal Stablilator spar.
The finished ASTs
Note that the RV-12 has a single control surface that combines the functions of a horizontal stabiliator (the little wing at the back of an airplane) and the evelators (the bits that make the airplane point up or down), and so it is called a Horizontal Stabilator.
This is the largest part of the aircraft that I have assembled so far.
it is 8 feet wide and is made up of a main spar, front and rear ribs, and covered with 2 large skins.
The first job is to construct the spar, which itself is made from a front and rear spar cover, top and bottom spar sides and 4 ribs.
There's some small pieces to separate and drill and quite a bit of test fitting, final drilling and such to get all the various bits in the right place.
The Vans kit and plans are very well thought out, at first read you often wonder, why the heck is that rivet needed there, or what purpose does this bit have, but as you get further along in the assembly it all becomes clear, everything has a purpose, and every design decision has a reason, it's very enlightening.
Another thing that amazes me is how simple the basic design idea is, really light and really strong. It is called Monocoque construction, and uses the skins to create a load bearing surface, allowing for a very light interior frame that does not need to take that much stress.
Wooden houses are built the same way, simple 2x4s make a frame, and wouldn't be strong enough to hold up a house, until the exterior plywood (or usually OSB these days) sheets are added, It's actually those sheets that distribute the load, and make the construction super strong because of the large surface area, and so it is for airplanes, except we use Aluminium because it's lighter and doesn't rust or rot.
(The americans use Aluminum which I hear is almost as good :) )
There are other kinds of construction that use welded steel tube frames to take the load, and cover the frames with thin light material just to provide the lift surface area and reduce drag, this is called Truss construction and is used in airplanes like the piper cub. It's not as common these days, probably because the aluminium monocoque is lighter, and less weight means more performance per horse power, more efficient, cheaper to run, but those old piper cubs from 1940 are still flying and are probably 5 times stronger than they ever needed to be !
Here's where I got to before clocked out for the day on Sunday, the horizontal stabilator spar partly assembled:
Saturday, May 21, 2011
cracked ribs, deburring HStab, ASTs, 10 hours, 41 total so far
This weekend was spent deburring and priming parts for the stabilator and the ASTs
not much to take photos of really, however :
Vans released a service bulletin to check for cracks in the nose ribs of the stabilator.
My kit was one of those affected, so I checked them all and found one that had 3 cracks.
Vans recommends stop-drilling but I think I'd rather replace that part.
I'm going to call them Monday and see what they say.
not much to take photos of really, however :
Vans released a service bulletin to check for cracks in the nose ribs of the stabilator.
My kit was one of those affected, so I checked them all and found one that had 3 cracks.
Vans recommends stop-drilling but I think I'd rather replace that part.
I'm going to call them Monday and see what they say.
Sunday, May 8, 2011
Section 07 (Rudder) completed, started work on AST tabs, 10 hours, 31 total
It didn't take long to pull the last rivets on the rudder and that's another section complete.
So then I started work on the ASTs.
The way the AST (Anti-Servo Tabs) work is very interesting, (if you are interested do a search on Wikipedia) but simply put the tabs work to create an opposite force to the horizontal stabilator in order to increase the force the pilot must use as deflection increases.
This makes the controls feel correct and act nice and balanced.
When completed and assembled to the horizontal stabilator you can see how the tab moves in the opposite direction as the stabilator changes angle of attack.
the ASTs are also connected to an electric motor to provide pitch trim during flight.
But all that comes later, first they have to be built.
Here are all the parts
And here is a test fit of the assembled left AST (there are 2, left and right, but they actually just work as one long unit)
And then came the second big mess up of the project:
The control horns require countersinking, which should have been no problem, but I decided to use the machine countersink cage on my drill, (previously I had been doing the countersinks using the hand tool).
Anyway, I tried it out on some scrap and got the depth just right using an AN426AD3-3.5 to test the fit.
Then moved on to the real piece and it worked great for 3 holes, and on the 4th it gouged a huge hole for no apparent reason !
The 5th hole worked fine, I have no idea what I did wrong with that 4th hole, but either way this is now a ruined piece grrrrrr.
I ordered another from Vans, and did the other side by hand, which worked out fine.
I really need to figure out what went wrong, because countersinking all the holes to come by hand is going to be too much I think.
So I pushed on and got everything deburred, cleaned, scotchbrite scuffed and ready for primer.
I didn't actual start the priming because of the wind outside and anyway it was mothers day and we had family stuff to do.
I'll get the parts primed and assembled, (except for the damaged horn) next week.
So then I started work on the ASTs.
The way the AST (Anti-Servo Tabs) work is very interesting, (if you are interested do a search on Wikipedia) but simply put the tabs work to create an opposite force to the horizontal stabilator in order to increase the force the pilot must use as deflection increases.
This makes the controls feel correct and act nice and balanced.
When completed and assembled to the horizontal stabilator you can see how the tab moves in the opposite direction as the stabilator changes angle of attack.
the ASTs are also connected to an electric motor to provide pitch trim during flight.
But all that comes later, first they have to be built.
Here are all the parts
And here is a test fit of the assembled left AST (there are 2, left and right, but they actually just work as one long unit)
And then came the second big mess up of the project:
The control horns require countersinking, which should have been no problem, but I decided to use the machine countersink cage on my drill, (previously I had been doing the countersinks using the hand tool).
Anyway, I tried it out on some scrap and got the depth just right using an AN426AD3-3.5 to test the fit.
Then moved on to the real piece and it worked great for 3 holes, and on the 4th it gouged a huge hole for no apparent reason !
The 5th hole worked fine, I have no idea what I did wrong with that 4th hole, but either way this is now a ruined piece grrrrrr.
I ordered another from Vans, and did the other side by hand, which worked out fine.
I really need to figure out what went wrong, because countersinking all the holes to come by hand is going to be too much I think.
So I pushed on and got everything deburred, cleaned, scotchbrite scuffed and ready for primer.
I didn't actual start the priming because of the wind outside and anyway it was mothers day and we had family stuff to do.
I'll get the parts primed and assembled, (except for the damaged horn) next week.
Sunday, May 1, 2011
section 06 completed, section 07 nearly complete, 12 hours this weekend, total 21 hours
Had a very busy weekend, I managed to do some work in the garden (new planting area for vegetables) and fixed up some loose steps on the deck.
Despite that I managed to get a few hours in each day Saturday and Sunday working on the plane.
I also had help from my good friend Philippe and his son Alec.
Things really worked out well this weekend, I even got my old compressor fixed (for free !) I thought it was gonner and was told just to "buy a new one it will be cheaper" by most people I asked, but it turns out to have been just a stuck valve !, a local hardware store that I really like has very knowledgeable people, a nice family run business a quick trip down there and they guy had my compressor fixed in 5 minutes, no charge, great service !
So Saturday morning was spent doing the aforementioned random tasks, and I got started late in the afternoon with finishing the VS.
I decided to prime all parts that will be closed up and never seen again.
I'm using duplicolor self etching primer rattle cans, it seems to be working out ok, it's not something I would do for areas that will be seen in the final product, but for all the internals, it covers nicely if not altogether as neat as a professional job.
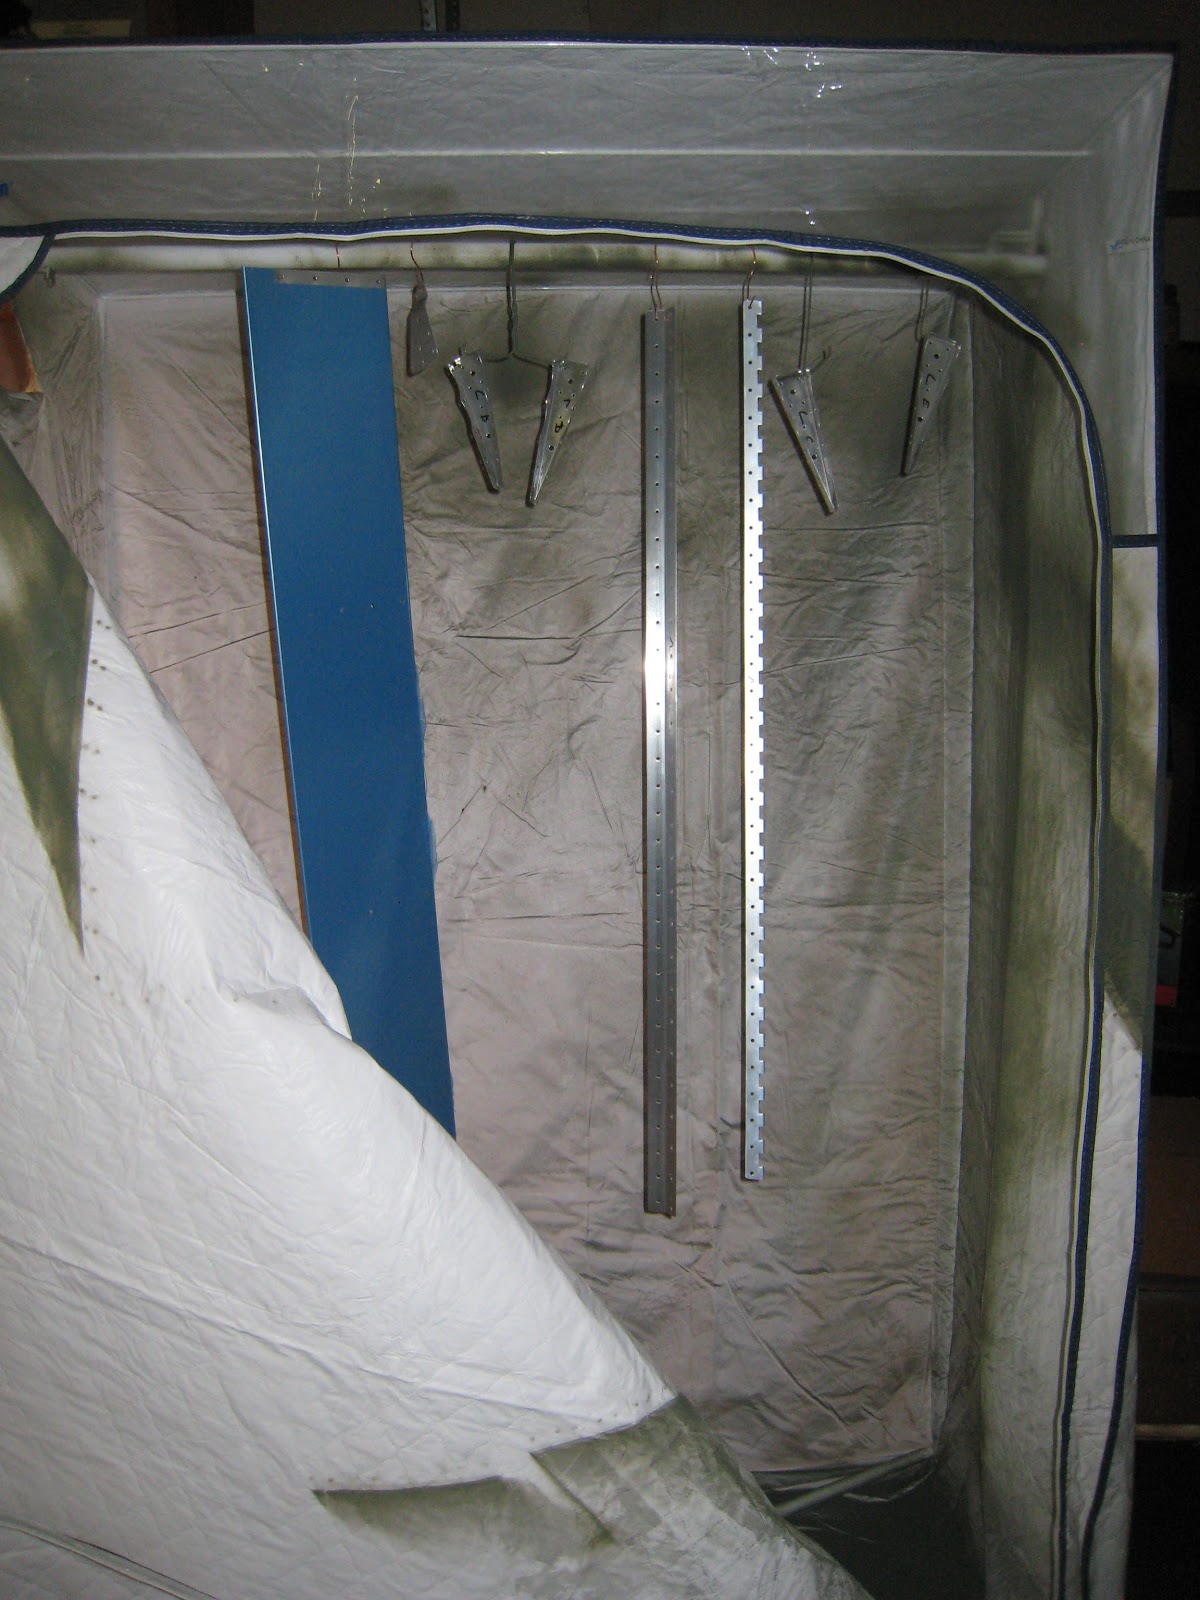
I put to use an old temporary closet that we have had stored under the house for 16 years, it's one of those $15 things from target that we got way back before we owned a home just as a temporary solution.
Anyway, it works great as a spray booth
I tried it first on the rudder hinges
then riveted them which was my first squeezed rivets of this size, it took a while to figure out the pneumatic squeezer to get the pressure to set them properly, it's quite a fiddly job, not sure if all tools work the same, but for mine I have to unwind the adjustment just wide enough to get the length of the rivet in the gap, then with the universal head in the indentation adjust the setting until it closes completely on the length of the rivet, then when I trigger the squeezer it has _just_ enough force to correctly set the rivet, this means opening the adjustment and closing it on every rivet, very time consuming, I'm wondering if there's something I'm doing wrong?
Anyway, it does set the rivets properly (checked with a rivet gauge) and I've not had any bad ones yet (not that I've done many!)
Priming isn't taking too long really, I wash with acetone and lightly Scotchbrite the surface, then put the parts in the spray booth and a spray on a couple of light coats. It covers nice and thin and light.
I debur edges and holes of other parts while the primer dries, so it's not wasted time.
Assembly of the VS skeleton was very fast, the blind rivets are extremely easy and quick to do.
I think nearly all the time building this plane will be deburring, the rest of it seems very quick and easy, and the actual riveting of the assemblies together takes hardly any time, like all good jobs, it's all in the preparation.
Finished VS Skeleton
While the primer dryed on the VS skin I started section 07 - the rudder
Once I had deburred all those parts, the VS skin was ready to rivet onto the VS skeleton.
Phil and Alec helped with all the cleco insertion and removal and cleared away the rivet mandrels as I went down the rows.
Here is the finished VS, the blue plastic looks a mess, but I decided to leave it on for now to avoid scratches
Time caught up with me on Sunday and I didn't get to finish the rudder, but it's almost done, the first rivets in the skin have been set, I just need to finish this side and rivet the other side, maybe I'll get a hour after work one day this week...
Despite that I managed to get a few hours in each day Saturday and Sunday working on the plane.
I also had help from my good friend Philippe and his son Alec.
Things really worked out well this weekend, I even got my old compressor fixed (for free !) I thought it was gonner and was told just to "buy a new one it will be cheaper" by most people I asked, but it turns out to have been just a stuck valve !, a local hardware store that I really like has very knowledgeable people, a nice family run business a quick trip down there and they guy had my compressor fixed in 5 minutes, no charge, great service !
So Saturday morning was spent doing the aforementioned random tasks, and I got started late in the afternoon with finishing the VS.
I decided to prime all parts that will be closed up and never seen again.
I'm using duplicolor self etching primer rattle cans, it seems to be working out ok, it's not something I would do for areas that will be seen in the final product, but for all the internals, it covers nicely if not altogether as neat as a professional job.
I put to use an old temporary closet that we have had stored under the house for 16 years, it's one of those $15 things from target that we got way back before we owned a home just as a temporary solution.
Anyway, it works great as a spray booth
I tried it first on the rudder hinges
then riveted them which was my first squeezed rivets of this size, it took a while to figure out the pneumatic squeezer to get the pressure to set them properly, it's quite a fiddly job, not sure if all tools work the same, but for mine I have to unwind the adjustment just wide enough to get the length of the rivet in the gap, then with the universal head in the indentation adjust the setting until it closes completely on the length of the rivet, then when I trigger the squeezer it has _just_ enough force to correctly set the rivet, this means opening the adjustment and closing it on every rivet, very time consuming, I'm wondering if there's something I'm doing wrong?
Anyway, it does set the rivets properly (checked with a rivet gauge) and I've not had any bad ones yet (not that I've done many!)
The VS spar gets riveted where the hinge attaches
Priming isn't taking too long really, I wash with acetone and lightly Scotchbrite the surface, then put the parts in the spray booth and a spray on a couple of light coats. It covers nice and thin and light.
I debur edges and holes of other parts while the primer dries, so it's not wasted time.
Assembly of the VS skeleton was very fast, the blind rivets are extremely easy and quick to do.
I think nearly all the time building this plane will be deburring, the rest of it seems very quick and easy, and the actual riveting of the assemblies together takes hardly any time, like all good jobs, it's all in the preparation.
Finished VS Skeleton
While the primer dryed on the VS skin I started section 07 - the rudder
Once I had deburred all those parts, the VS skin was ready to rivet onto the VS skeleton.
Phil and Alec helped with all the cleco insertion and removal and cleared away the rivet mandrels as I went down the rows.
Here is the finished VS, the blue plastic looks a mess, but I decided to leave it on for now to avoid scratches
Phil and Alec
My first completed airframe part !
Test fitting the rudder hinge
Time caught up with me on Sunday and I didn't get to finish the rudder, but it's almost done, the first rivets in the skin have been set, I just need to finish this side and rivet the other side, maybe I'll get a hour after work one day this week...
Subscribe to:
Posts (Atom)