Saturday, June 18, 2011

Horizontal Stabilator Finished - 8 hours, 77 total so far

My in-laws have come over to visit for the summer and I'll be taking a bit more time off work for socializing, and hopefully some aircraft construction :)
My father-in-law repaired aircraft for the RAF and is a metalworker by trade, so I am really hoping to learn a lot and get my skills up to snuff with his help.
He worked on huge monster aircraft Blackburn_Beverley so my little -12 should be a doddle.
Still, regardless of the size difference, it's amazing how similar the construction techniques are even after 50 years.

So, another hard days work saw the end of the horizontal stabilator section and I am now ready to start the tailcone which will pretty much finish this first rv-12 kit off, which is perfect timing since Vans says the wing kit is due for delivery next week.

Barry pulling the last rivets:

The hedgehog impression:

Right side done:

All done

Hinges attached, torqued and sealed

Sunday, June 12, 2011

Horizontal Stabilator Assembly - 12 hours, 69 total so far

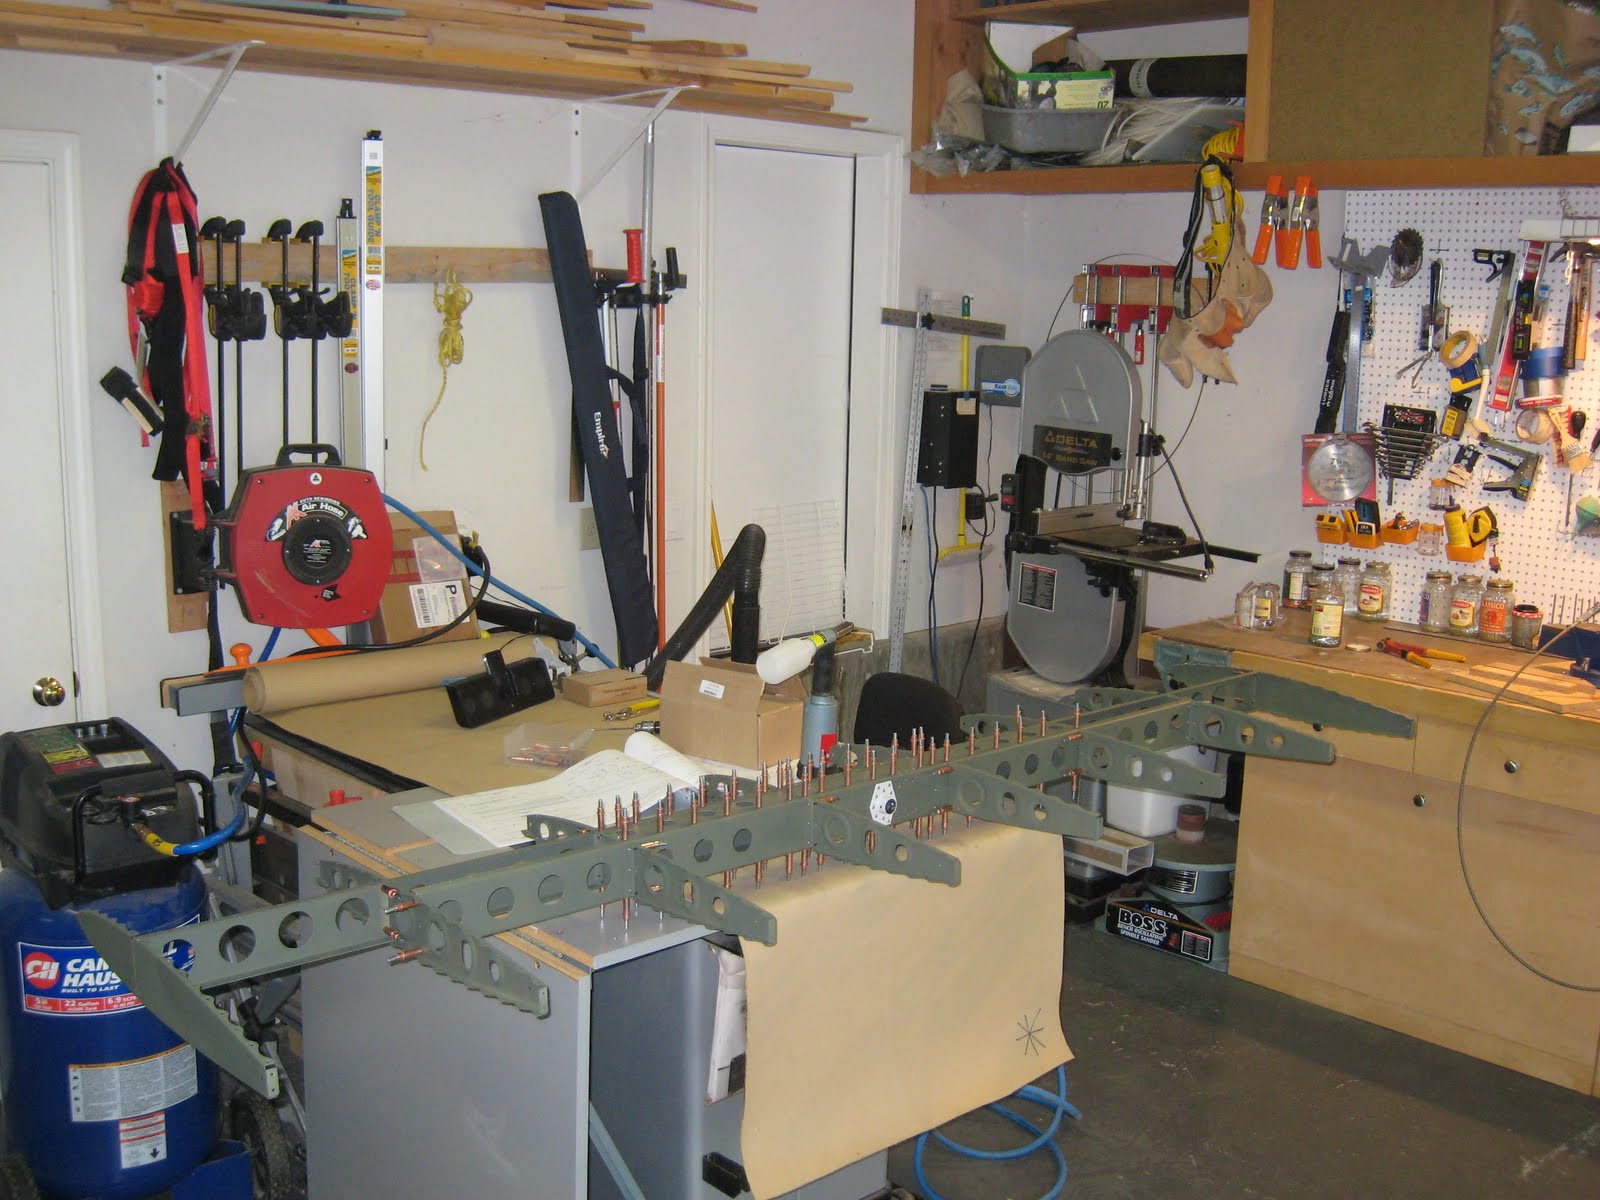
This weekend was much more fun, after a bit of final priming I assembled the horizontal stabilator frame.
Most of the assembly is very straightforward, although you do have to pay careful attention to which rivet to use where, there's some flush pop rivets as well as the regular AN426 countersunk rivets, and also some AN470-AD-4 solid rivets.

I found that the CS4-4 countersunk pop rivet shanks get stuck in the pneumatic rivet puller when being ejected, and so I pulled all those with the hand tool.
The AN426-AD-3 rivets were all set with the hand squeezer, but the AN470-AD-4 rivets are MUCH harder to squeeze, and it's another one of those jobs that requires more arms than I happen to have attached, so I really wanted to use the pnuematic squeezer on those, and there lies this tale:

Here's a little bit of the story that happened during the week.
I had been having trouble with my pneumatic squeezer, it has never worked properly since I bought it for the project in April. Having never owned or operated one before, I wasn't sure if it was faulty, or if it was just my limited experience and poor technique.
I tried to use it for a few rivets on the hinges of the VS, the first part of the kit, but everything was so new to me, I had no idea what was working properly and what wasn't and that part of the kit only used the smaller AN*-AD-3 rivets so up until now I have been using my hand squeezer, which has been working very well, so well in fact that I was now convinced that the pneumatic squeezer was defintely not operating properly.
So I downloaded the latest manual, read it all and took note of the "bleeding procedures"; This particular squeezer is hydraulic just like a car brake system, and even though it is new and shouldn't need maintenance I thought I would give that a try.
Well, as you can imagine, it's a messy job that is designed for people with at least 4 arms which I was unfortunate enough not to be born with, but I did manage to get it done. Once I got it set all up again I tried a rivet, and it was exactly the same as before, just not enough power or travel to properly squeeze a rivet.
Oh, well I decided to return it, and hoped that I could get my money back, I emailed cleveland and they were very helpful and offered to take the unit back for a full refund, nice.
But it was bothering me that I couldn't figure this out, it was a well made expensive unit, why would it function so poorly?, I decided to call the manufacturer, actually I sent email, and they replied almost immediately and were very helpful, offered suggestions on more bleeding and a few other tips, but also said they would have no problem replacing the unit, send it to them directly and they would examine it and figure out what was wrong, I got a very good vibe from them, so decided to give it another go.
So, first thing Saturday morning, I got out the paper towels ready for the mess, and determined to really do this job properly, followed the instructions to the letter, exactly 1 1/2 turns of the valves, as much height as possible for the head over the base unit and this time I pumped the oil through over and over, 8 syringes full.
I didn't see any air escape and so I expected the same poor performance, but wow what a difference, it worked superbly, this is now my favorite tool of the whole job, it squeezed the AN470-AD-4 rivets perfectly with no noticeable effort at all.
I'm glad I stuck with it and sent a note of thanks to the manufacturer for their help.

So, that put me in a good mood and I assembled everything except the skins of the HS which still need priming, and are too big to fit in my "paint tent". It was extremely windy this weekend, so no chance of painting them outside either, so that will have to wait.
I am very happy with the HS, this really looks like a proper airplane part !


Sunday, June 5, 2011

deburr, deburr, deburr, prime, deburr, etc., deburring. 16 hours, 57 total so far

I have spent most of this weekend and last weekend preparing more parts.
I've deburred and primed and deburred and primed.
I did manage to do a little assembly, the ASTs are now fully assembled and I have started the assembly of the Horizontal Stablilator spar.

The finished ASTs


Note that the RV-12 has a single control surface that combines the functions of a horizontal stabiliator (the little wing at the back of an airplane) and the evelators (the bits that make the airplane point up or down), and so it is called a Horizontal Stabilator.

This is the largest part of the aircraft that I have assembled so far.
it is 8 feet wide and is made up of a main spar, front and rear ribs, and covered with 2 large skins.

The first job is to construct the spar, which itself is made from a front and rear spar cover, top and bottom spar sides and 4 ribs.
There's some small pieces to separate and drill and quite a bit of test fitting, final drilling and such to get all the various bits in the right place.
The Vans kit and plans are very well thought out, at first read you often wonder, why the heck is that rivet needed there, or what purpose does this bit have, but as you get further along in the assembly it all becomes clear, everything has a purpose, and every design decision has a reason, it's very enlightening.

Another thing that amazes me is how simple the basic design idea is, really light and really strong. It is called Monocoque construction, and uses the skins to create a load bearing surface, allowing for a very light interior frame that does not need to take that much stress.
Wooden houses are built the same way, simple 2x4s make a frame, and wouldn't be strong enough to hold up a house, until the exterior plywood (or usually OSB these days) sheets are added, It's actually those sheets that distribute the load, and make the construction super strong because of the large surface area, and so it is for airplanes, except we use Aluminium because it's lighter and doesn't rust or rot.
(The americans use Aluminum which I hear is almost as good :) )

There are other kinds of construction that use welded steel tube frames to take the load, and cover the frames with thin light material just to provide the lift surface area and reduce drag, this is called Truss construction and is used in airplanes like the piper cub. It's not as common these days, probably because the aluminium monocoque is lighter, and less weight means more performance per horse power, more efficient, cheaper to run, but those old piper cubs from 1940 are still flying and are probably 5 times stronger than they ever needed to be !

Here's where I got to before clocked out for the day on Sunday, the horizontal stabilator spar partly assembled: